
** Edited to add - check out this awesome blog post and video from the amazing Jennifer McGuire who also uses the same stencil storage that I share below.
You can now get these stencil sleeves in packs of 100 at Simon Says Stamp here.
Hello!
You can now get these stencil sleeves in packs of 100 at Simon Says Stamp here.
Hello!
One of my favorite products that was released at CHA (the craft and hobby trade show) this year was the Wendy Vecchi Stamp-it Stencil-it! system. You not only get a great stamp image, but you also get a stencil that fits perfectly over the stamped image.

There are so many fun things that you can do with these and I have a couple of cards today showing what I've done with them so far.
Hi Card (using translucent embossing paste)


For this card, I first stamped the daisy image onto watercolor paper and then coloured it in with Distress Markers and water. I wanted a washed out watercolor look, so I didn't add a lot of colour. Once it was dry, I placed the stencil over the image and added translucent embossing paste over the top.
It's hard to see in the photo, but the entire flower image is shiny and the embossing paste is raised off the paper, giving really great texture and dimension. And before I added the embossing paste, I coloured the flower with a Clear Wink of Stella marker, to trap the glitter under the embossing paste.
Thanks Card (using distress inks)


For my second card, I wanted the colours on the flower to be a lot brighter than the first card, so for this one, I started with the stencil. I adhered it down onto my white cardstock so it wouldn't shift, and then I used little sponge daubers to apply the different colours that I wanted for the flower. I pushed the sponge down into the page as I added the colour, to get it as dark as I could.
For the flower, I fit applied pumice stone distress ink to the center and then added the pink around it, blending it in with the sponge. Once I had the pink how I wanted it, I added some shaded lilac on top for additional colour.
Once I had all the colours how I wanted them, I removed the stencil and then stamped the flower image directly on top. I love the artsy look it gives the image, because the ink comes out of the lines in some parts, but still has defined edges from the stenciling. Love that look! ;)
Supplies:
 |  |  |  |  |  |  |
 |  |  |  |  |  |  |
 |  |  |  |  |  |  |
 |  |  |  |
InLinkz.com
Stencil Storage
Stencil Storage
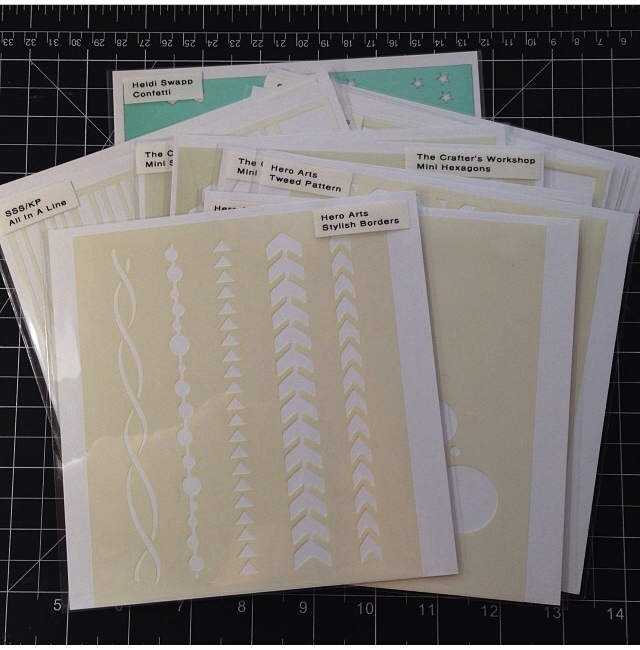
I also wanted to quickly share how I store all of my stencils.
I shared this picture on Instagram last December, showing what I use to store them and I've had a lot of questions about what they are and some specific details.
Stencils have become really popular (Online Card Classes just did an
awesome class called Stenciled that you can take anytime... you can get the
details here) so a lot of people are trying to find storage systems
that work for them. I really like what I'm doing with mine and just
wanted to share in case anyone still needs ideas. ;)
I use clear flap bags (which will soon be available for purchase at Simon Says Stamp! Woot!) that are 6 1/4" x 6 7/16" in size. These are slightly larger than 6x6 stencils and the stencils fit in perfectly! I just cut the flap part off so they're open at the top.
I add cardstock squares (cut slightly smaller than the sleeve) for support and then I slide the stencil down in front. Then I label them and just store them all in a container with dividers so I can easily flip through to find what I need. I just use a plastic container (I think it was intended for cd's) that's slightly larger than the stencil storage sleeves.
I have a quick little video showing them in a bit more detail so it's easier to see what I'm describing:
Please let me know if you have any questions at all about my storage system. I hope it helps those of you still looking for ideas!!
Thanks for stopping by today -
Be back soon!
Steph ;)
Thanks for stopping by today -
Be back soon!
Steph ;)


Thanks for sharing this technique and your storage solutions.
ReplyDeleteAll I need now is a bit more space. ;-)
Fabulous work.. And thank you for the storage idea that's a fab way to store them Px
ReplyDeleteLoving the stamps/stencils combo and love the effect on your second card with the ink outside of the edges. Thanks for sharing your storage idea too, always good to get ideas...although at the moment I don't own any stencils. That has to change! :D x
ReplyDeletelove the cards, and the video was a wonderful bonus!
ReplyDeletelove and thx for video was great
ReplyDeleteVery pretty card...thank you for the video.
ReplyDeleteHadn't heard of this new product - will have to get it!
ReplyDeleteLove your use of the layers of stamping, embossing paste and Wink of Stella.
ReplyDeleteGreat idea for stencil storage. Are these plastic sleeves? Is there anywhere else these can be bought? Thanks
ReplyDelete