Showing posts with label Guest Designing. Show all posts

Winnie & Walter January Leading Lady | Take 2

Hello! I am excited to share that for the month of January I will guesting with Winnie & Walter as their Leading Lady. You can find me over at their blog every Saturday in January here.

Here is a peek at the card I'm sharing this week...


You can see the full card with details and a video on the W&W blog here.

Giveaway!

Leave a comment on any of my Saturday posts here on my blog in January and I will draw a winner for a $30 GC to Winnie and Walter at the end of the month.

I hope you enjoy today's card design and I look forward to seeing you again next Saturday. ;)

Supplies


SHARE THIS POST - {PINTEREST}

Guest Designing with Concord & 9th | You're My Kind of Friend

Hello! I'm back today with my last post as a guest designer with Concord & 9th! I have had so much fun creating with the new products and am trilled that they had me guest with them these past few weeks!

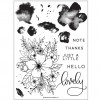
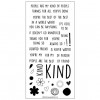
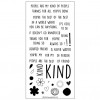
For my card today, I used the Hello Lovely stamp set and paired it with the Kind Card Frame die and the Kindhearted stamp set to create a soft card with a bit of glitter.

I partially stamped the flower outline in grey ink and then I used some of the background watercolor stamps to add some colour to the large flower and some of the leaves with some really soft ink colours.

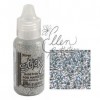
I diecut the word kind from gold glitter paper and grey cardstock and layered them together over the flower and then I added the rest of the sentiment above and below the large Kind word. I completed the card by adding some clear sequins with gold Stickles in the center.

Thanks again for joining me this month as I shared projects featuring Concord & 9th. Such an awesome company with amazing people and products! ;)

Supplies


SHARE THIS POST - {PINTEREST}

Guest Designing with Concord & 9th | You're Amazing

Hello! I'm back today with another card to share using the new release from Concord & 9th! For my card today, I used the new Above Average stamp set to create a geometric, clean & simple card.

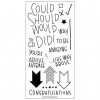
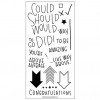
I used the large open arrow stamp and stamped nine different arrows along the bottom and the left side of the white cardstock panel. I changed up how much of the arrow I stamped each time to give it a fun, unexpected design. I love how it looks with the arrows all stamped at different sizes and angles.

Once I had all of the arrows stamped, I used Copic markers and coloured them all in. I used shades of aqua and green on the majority of the arrows and then I added one grey one for some added interest. Once I had them all coloured, I trimmed down the panel so it was slightly smaller than the card base in width and then I adhered ti to the card.

I added a strip of grey and white striped patterned paper on the left side and then I added a thinner strip of silver sparkle cardstock. I completed the card by stamping the sentiment diagonally between the middle arrows and then I added some clear sequins for some added dimension.

Thanks so much for joining me today! I'll be back next week with one more card to share using the newest Concord & 9th release! ;)

Supplies

SHARE THIS POST - {PINTEREST}

Guest Designing with Concord & 9th | Hello

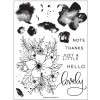
Hello and welcome to my second post this month featuring the amazing new products from Concord and 9th! I am in LOVE with the new Hello Lovely stamp set and couldn't wait to ink it up! There are so many amazing techniques that can be done with gorgeous stamp. it was kind of hard to decide on one lol! ;)

I decided to stamp it on white cardstock with Tuxedo Black Memento ink and colour in the flowers with Copic markers. Once I had them all coloured, I put the cardstock panel back into the Misti (the stamp was still in place from the first time I stamped it), and stamped it a second time, directly over top, with Versamark ink.

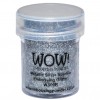
I then added Wow Silver Sparkle embossing powder onto the stamped image and heat embossed it. I was left with the beautiful colourful flowers with a silver sparkle outline. This is my favourite way to combine heat embossing and Copics. It allows me to colour with no worries about damaging my markers and I still get the amazing embossed look when I'm done.

Once I completed the embossing, I cut down the panel and adhered to to another panel that was dry embossed with a strip detail. I then added the entire piece to a top-folding white card base. I added a strip of silver sparkle cardstock down the right side and then I added the sentiment (that I had heat embossed with white onto a piece of vellum) directly over the flowers. 

I finished the card by adding some clear sequins, with silver Stickle centers, scattered around the flowers and in the center of the largest flower. I'll be abck next week with another card featuring Concord & 9th! Thanks for stopping by! ;)

Supplies

SHARE THIS POST - {PINTEREST}
 
SITE DESIGN BY DESIGNER BLOGS