Blog Address Change

Please note that due to some issues that couldn't be resolved and the need to streamline my accounts, I will be posting all content on a new blog going forward.

You can now find me at sklauck.blogspot.com

I apologize for the inconvenience of this change and I hope to see you at my updated blog! ;)

Thanks!

SHARE THIS POST - {PINTEREST}

Essentials By Ellen Blog Hop | February 2017 Release

Welcome to the February 2017 Essentials by Ellen Release Hop! I’ll be showcasing several of the new products on my post today! You should have arrived from the blog of the amazingly talented Brandi Kincaid!


Stay tuned to the end of this post, because I’m giving away an Essentials by Ellen stamp set! 

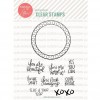
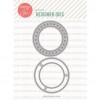
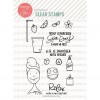
For my first card today, I used the new Mirror Mirror stamps and dies along with the Spa Day stamps and dies to create a card that seems a little busy and wasn't the design I had originally intended,  but I love how it turned out and I think it sends a great message!

I stamped and diecut the mirror in the center of a white cardstock panel and then I added almost all of the sentiments from the Mirror Mirror stamp set around the mirror all over the white panel. I used foiled cardstock for the mirror and used Copic markers to colour the frame of the mirror and the lights.


I stamped the woman image from the Spa Day stamp set onto white cardstock, coloured her in with Copic markers, diecut her and then adhered her in front of the mirror.

You can see the video sharing how I created this card below:


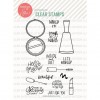
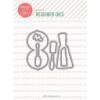
For my second card, I used the new Make It Beautiful stamp set and coordinating dies to create a fun nail polish themed scene on my card with a really fun sentiment. ;)

I stamped the nail polish bottles onto white cardstock with Tuxedo Black Memento ink and then I coloured each of them in with different colours of Copic markers. Once I was done with the colouring, I added Glossy Accents to the top of each one to make them raised and shiny.


I diecut the outline of the bottle into the main white cardstock panel and then I adhered the panel with foam adhesive. I added the green bottle into the diceut opening, but adhered it directly onto the card base so it would be lower then the diecut panel.

I added the red and aqua bottles to the panel, one direct to paper and one with foam adhesive, stamped the sentiment and added some clear sequins. You can see how I created the card in the video below:


Giveaway!!

Leave a comment on this blog post for a chance to win today's giveaway! The winner may choose any in stock Essentials by Ellen brand stamp set  (Maximum value $25 USD) at Ellen Hutson.com  To enter, please leave a comment on today’s post by Tuesday, February 28!

ALL winners will be announced at the CLASSroom on Friday, March 3Please check there on that date to see if you are a winner and for further details on claiming your prize!


Your next stop on the hop is the awesome Emily Leiphart!
If you get lost along the hop, please visit the CLASSroom blog for a complete list of all the designers.

Happy Hopping! ;)

Supplies


SHARE THIS POST - {PINTEREST}

MFT Beautiful Butterflies Card Kit Countdown | Day 1

Hello! Welcome to the second day of the countdown to the newest card kit from My Favorite Things called Beautiful Butterflies! This month's kit is absolutely gorgeous and includes two stamps sets, a die set, black embossing powder, a Versamark ink cube, two sheets of translucent vellum and a beautiful assortment of cardstock.

For my card today I used the largest solid butterfly image and stamped it three times onto watercolor cardstock using Distress inks. And since Distress inks aren't really great for image stamping (they're better for techniques) I used a paintbrush with water and painted over each of them after I stamped them to even out the colour and give them a watercoloured look.

Once they were dry, I stamped the black outline part of the layer using Black Licorice dye ink and then I diecut all three of them using the coordinating Die-namics die. I love the black outline against the bright pop of colour! ;)

I stamped the sentiment onto a piece of white cardstock and cut it into a strip. I added black and white polka dot patterned paper to the sides of a top folding card base and then I added a white cardstock panel to the middle.

I adhered the butterflies in the center of the cardstock panel and used foam adhesive under the top of the wings of the green and pink butterfly. I trimmed off the parts of the top and bottom butterfly that went off the card front.

Make sure to head over to the MFT blog to see more cards created by the design team using this months kit. ;)

Supplies


SHARE THIS POST - {PINTEREST}

MFT February Card Kit | Beautiful Butterflies

Hello! Welcome to day one of the countdown to the newest card kit from My Favorite Things called Beautiful Butterflies! This month's kit is absolutely gorgeous and includes two stamps sets, a die set, black embossing powder, a Versamark ink cube, two sheets of translucent vellum and a beautiful assortment of cardstock.

For my card today I used the detail layer stamp of one of the butterflies (all of the butterflies have multiple stamps that layer together) and embossed 3 black butterflies onto a watercolor panel using the black embossing powder from the kit.
Once I had the butterflies embossed, I did a fun inky technique where I added colour over top by scribbling onto a plastic sheet with Tombow Dual Brush markers and then I added some water with the colour. I then flipped the plastic sheet over onto the embossed panel and pushed the ink onto it with my fingers. I love the random watercolor look you get every time you do this technique! ;)

I decided to leave the front without a sentiment and instead, stamped it on the inside with black ink. I love the artistic watercolor look on the front and didn't want to cover any of it up with a sentiment strip.

You can see how I created this card in this weeks episode of MFTv on the MFT YouTube channel (linked in my blog sidebar).

Make sure to head over to the MFT blog for more projects created by the design team with this months kit. ;)
Supplies


SHARE THIS POST - {PINTEREST}

MFT Release Replay | February 2017

Hello! It's been a week since the newest release went live from MFT Stamps and today the design team is revisiting all of the new products and sharing more fun ways to use them! It's so exciting to see everyone receiving their new goodies and creating! ;)

For today's card, I used the new Sketched Blooms 2 to create a simple, but colourful card. I love this stamp set and the endless floral designs you can create with it!
I stamped all of the leaves and flowers using various colours of rich, bold inks. I love the yellow, blue, orange and greens together... they blend and overlap so nicely together. Once I had all of the flowers stamped and I was happy with the design, I used the little tiny flower stamp and added some yellow and orange flowers mixed in with the larger ones.

I stamped the sentiment from the Lot's of Hugs stamp set onto white cardstock, cut it into a strip and adhered it onto the stamped panel at the bottom over the flower stems. I then adhered the finished panel to a Grout Gray card base.

Make sure to head over to the MFT Stamps blog to see what the rest of the design team created with the February release. ;)

Supplies


SHARE THIS POST - {PINTEREST}

MFT February 2017 Release | New Product Launch

Hello and welcome to the New Product Launch for the My Favorite Things February release. All of the products that we've been sharing all week are officially available in the MFT online store! 

For my card tonight, I'm sharing the card I created for this month's free online class that we offer with every release. It includes downloadable supplies and instructions as well as a video if you prefer videos over PDF's. ;)
This card features my favourite products from this month's release - the Lots of Hugs stamp set and the Twice the Hugs Die-namics.


You can find this months class (and all previous months classes) on the MFT blog in the Resources section on the sidebar.
Thanks so much for joining me for new product launch for the February release. I can't wait to see what everyone creates with this months release!! Make sure to head over to the MFT blog for more ideas from the creative team and giveaways! Happy shopping!

Supplies


SHARE THIS POST - {PINTEREST}
 
SITE DESIGN BY DESIGNER BLOGS