Hello! I'm back to share my last card that I created as the January Winnie and Walter guest designer! You can see the full post here on the Winnie and Walter blog.
I also have a winner to announce from all the comments left on my W&W blog posts all month.
Huge congrats to cghundley!
Hello and welcome to the September My Favorite Things Die-namics Design challenge! This month we are focusing our card designs on all of the awesome flower and leaf die-namics that MFT has to offer.
Since we are transitioning into fall this week, I decided to use the Falling Leaves die-namics for my card design to create a fall themed thank you card.
I diecut all of my leaves out of smooth white cardstock and then added ink to all of them using an ink blending tool and MFT dye inks. I used Coral Crush and Persimmon, Lemon Chiffon and Lemon Drop and Sno Cone and Blu Raspberry. I'm pretty sure there are no such thing as aqua leaves, but I love the way it looks with the corals and yellows so I went with it lol! ;)
Once I had the leaves all inked, I diecut a stitched rectangle from white cardstock and then lightly added a brick pattern to the center area with the English Brick Wall stencil and Grout Gray ink. I lightly went over the stencil with an ink blending tool until I had the bricks the intensity I wanted them and then I adhered the panel to a Grout Gray card base.
I added all of the leaves on top of the brick design and used foam adhesive for the top maple leaf. I stamped a sentiment with the Label Maker Sentiments stamp set and adhered it on the top leaf. I finished the card by adding glitter to some of the leaves and adding clear sequins around the leaf cluster on the card front.
Make sure to head over to the MFT blog today to see what the rest of the design team came up with for this months Die-namics Design challenge. Thanks so much for stopping by!
Winner
I also have to announce the winner of the Simon Says Stamp October card kit. Congrats to Paulette S! Please email me your contact info and I'll get your kit out to you! ;)
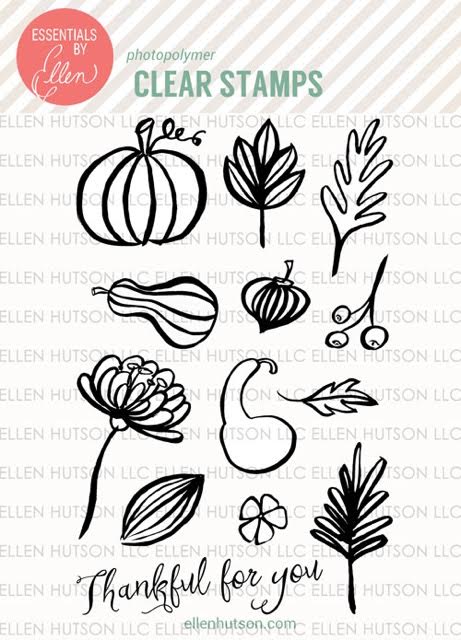
Hello! I am currently in the middle of my kitchen renovation (painted the primer on tonight... yay!!) so I don't have a card to share, but I did want to announce the winner of this stamp set from the Essentials by Ellen Holiday release blog hop:
Huge congrats to Nina-Marie Trapani! You were the randomly selected winner!! I've emailed you!
Thanks to everyone for stopping by on the hop! Be back soon!! ;)
Hello! Today I have another card to share that uses the awesome August Simon Says Stamp card kit. This kit is really fun because it has everything you need in it to make a shaker card - a clear transparency (a stamp pocket!), foam adhesive and confetti! ;)
I decided to make a summer themed shaker card with not only the confetti inside but a couple pairs of the flip flops from the stamp set. I just stamped them, coloured them and then cut them out before adding them into the shaker part!
I created a white card stock frame by diecutting two rectangle dies inside of one another and then adhered a piece of the stamp pocket that comes in the kit, to the back of the frame so I had a clear window. I just ripped it in half and cut out the same sized rectangle as my frame.
I added the foam squares that come in the kit completely around my frame to lift it off the card front and then filled the inside with the confetti from the kit and the two pairs of flip flops that I had coloured.
I added a sun sticker to one of the patterned papers from the kit that I had cut down to the same size as the rectangle frame and then I adhered that onto the foam adhesive to back the shaker part and seal all the confetti inside.
I added the shaker piece to an orange cardstock mat cut slightly larger and then adhered the whole thing to a white top-folding card base. I completed the card by adding a cloud puffy sticker on top of the acetate, slightly overlapping the sun image.
You can see how I created this card in the video below:
You can pick up the August card kit here for just $29.95 + shipping. Or if you’d like to receive this kit
and future kits for only $24.95 + shipping per month, you can subscribe here. When you subscribe you will receive kits delivered to your door automatically!
Winner
The winner of the August Simon Says Stamp card kit is Kamila R! Kamila please email me your contact info and I'll get your kit sent out! ;)
Hello! Today I have a couple of cards to share that use the Ken Oliver Color Burst powders. Color Bursts are concentrated powders that are meant to be used with water to create fun, unique watercolour effects. They are super fun and super addicting - it's so fun to watch them react when they come in contact with water! ;)
There are a lot of fun ways to use these awesome powders, but for today's post I'm just showing how fun and easy it is to create watercolour backgrounds with them. My first card used the Violet and Ultramarine Blue powders to create a night sky looking background.
I love the colours you get when you mix the blue and purple powders... so bold and vibrant. I actually created this background yesterday using the powders for the first time. I let the piece dry overnight rather than using my heat tool... I love the different looks you get from heat drying it or letting it air dry.
When I played with the Color Bursts the second time I used the Ultramarine Blue powder mixed with the Lemon Yellow to create a bluish green background. I am seriously amazed at how well the colours blend and stay true to colour.... they don't fade at all!
For this card, I stamped a simple sentiment in black ink and heat embossed it for some shine and dimension. I also added a few black hearts and some clear sequins and silver stickles. I love that the focus of both of the cards is on the awesome watercolour backgrounds.
You can see how I created the backgrounds and the Star card in the video below:
Winner
I also have to announce the winner of the July SSS card kit - congrats to Sue McRae!!
Please email me your contact info so we can send you your July card kit! ;)












 Posts
Posts

