Hello, and welcome to the
Holiday 2016 Essentials by Ellen Release Hop! I’ll be showcasing several of the new stamp sets and dies on my post today!
You should be arriving here from the amazing
Brandi Kincaid's blog - Brandi has some awesome designs in this release - amazing illustrations that capture the holidays perfectly!
I always love the
EH holiday release because the stamps and dies are perfectly designed and so unique! I have so many more card ideas that I can't wait to create! For my first card today I used the new
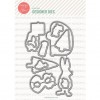
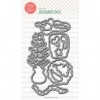
Fat Pants Stamps and Dies to create an adorable Mr. and Mrs. Snowman for the focal image on my card.
I love that you can stamp and diecut all of the pieces of the snowmen individually and then put them together. Makes it super easy to make them any colour or design for different looks every time.
I added some colour to the background panel on the card with Broken China distress ink and then I added some water and dabbed a bit off with a paper towel for a distressed look. I stamped the sentiment under the snowmen with Versafine Onyx Black ink and then I added some clear sequins for some added detail and dimension.
For my second card today, I used the new
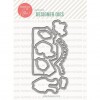
Believe die and an ornament die from the
Fat Pants dies to create a soft background with a bold sentiment.
I first diecut the ornament from masking paper and I added it to my white card stock panel. I then used Broken China distress ink on an ink blending tool and pulled the colour out from the center of the ornament mask onto the white card stock panel.
When I removed the mask I was left with a white ornament shape with the aqua colour surrounding it. I diecut the top of the ornament a second time from silver sparkle card stock, cut off the very top and adhered it to the ornament on the panel.
To create the sentiment, I diecut the word
Believe twice from white card stock and used various shades of green and red Copics to colour them with an ombre look. I then adhered them together, slightly offsetting them so the red would through from behind the green.I love the traditional pop of colour against the soft background.
I finished the card by adding some silver string to the top of the ornament and also added some clear sequins around the ornament on the card.
I couldn't stop at two cards, so I created a third one using the new
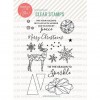
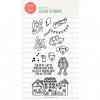
Homespun Holiday stamp set and dies. I love these fun whimsical designs and that wreath had me at hello! I am very picking when it comes to wreath shapes and this one is perfection!
I stamped the wreath lightly with black ink and then I coloured the entire thing with Copic markers. I then stamped it a second time directly on top with Versamark ink and heat embossed it with silver embossing powder.
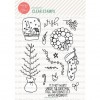
I stamped the sentiment from the
Season to Sparkle stamp set on a banner
cut from vellum and heat embossed it with the same silver embossing
powder. I then added it to the card front with a silver sparkle banner, a strip of aqua coloured card stock and a black and white striped patterned paper.
Thank you so much for stopping by my blog today for my stop on the hop! I am so so excited to see what everyone creates with the new release and I can't wait to share more cards using it!
And, yay!!! I also get to give away an Essentials by Ellen stamp set! The winner may chose ANY Essentials by Ellen brand stamp set (Maximum value $25 USD) currently in stock at
Ellen Hutson.com. To enter my giveaway, please leave a comment on today’s post by Tuesday, October 25th!
There is also a crazy good Grand Giveaway in the
CLASSroom! To enter, be sure to leave a comment there, also by Tuesday, October 25th!
ALL winners will be announced at the CLASSroom on Friday, November 4th! Please check there on that date to see if you are a winner and for further details on claiming your prize!
Your next stop on the hop is my amazingly talented friend
Amy Kolling!
If you get lost along the hop, please visit
the CLASSroom blog for a complete list of all the designers.
Shop the entire Essentials by Ellen Holiday Release:
Supplies used in today's cards:













 Posts
Posts

